
In the world of nail care and professional manicures, one issue that often frustrates nail technicians is sticky nail gel after UV curing. Despite numerous advances in nail products and innovative formulations, many professionals still experience situations where the gel remains tacky once it should have hardened completely. In this article, we will explore the causes of sticky nail gel, discuss external factors that may influence the curing process, and offer practical solutions to achieve a flawless, durable finish.
Introduction
Many nail artists and technicians have faced the annoying problem of a sticky top layer on their nail gel, even after following the recommended curing times. This issue not only affects the appearance of the manicure but may also reduce its durability. It is crucial to understand the underlying factors and adopt proper techniques to eliminate the tacky finish once and for all. This guide outlines the most common causes and provides actionable tips for resolving the sticky nail gel problem.
Understanding the UV Curing Process
To effectively address the sticky gel issue, it is essential to understand how the UV curing process works. Nail gel products are formulated to polymerize when exposed to ultraviolet light, transforming from a liquid into a hard, resilient coating. However, several factors, from the intensity of the UV lamp to the quality of the product ingredients, can influence the outcome.
How Does the UV Lamp Work?
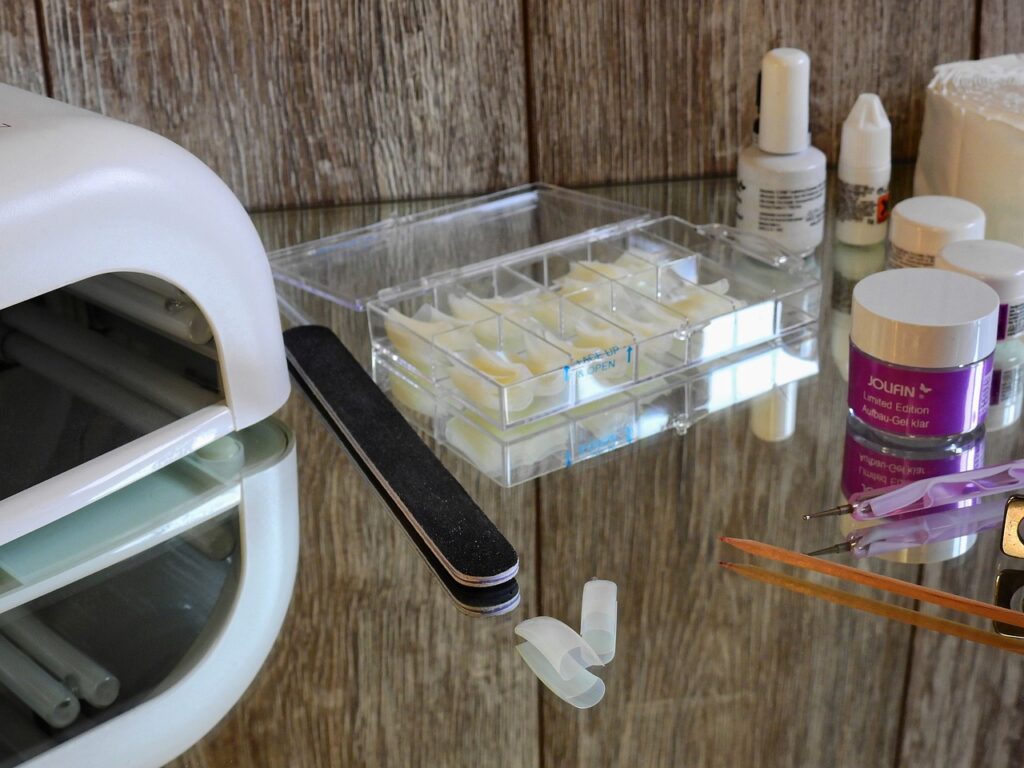
UV lamps are the cornerstone of the nail curing process. These devices emit ultraviolet light that triggers a chemical reaction in the gel, initiating polymerization. Important aspects of UV lamps include:
- Type and Power: Different lamps operate at various wattages. A lamp with insufficient power may not deliver enough UV energy for complete curing.
- Lamp Age and Quality: Over time, UV lamps lose efficiency. An older or lower-quality lamp may cause uneven curing, resulting in a sticky residue.
The Role of Nail Gel Ingredients
Nail gels are composed of polymer ingredients, photoinitiators, and additives that enhance viscosity and the final look of the cured product. Photoinitiators play a crucial role by absorbing UV light and triggering the polymerization reaction. However, if the formulation is imbalanced or subpar ingredients are used, the gel will not cure properly, leading to a tacky finish.
Main Causes of Sticky Gel After Curing
Several factors can lead to a sticky nail gel surface even after UV exposure. Recognizing these issues is the first step to resolving the problem:
Insufficient Curing Time
One of the most common reasons for a sticky gel is inadequate curing time. Every nail gel product comes with manufacturer-recommended exposure times. If the curing time is too short, the polymerization process does not complete, leaving the gel tacky. Always test on a single nail first and adjust the exposure as needed.
Improper UV Lamp Intensity
The intensity and condition of the UV lamp are crucial. A lamp that is too weak, outdated, or poorly maintained will hinder the curing process. Ensure your lamp meets the product specifications by:
- Regularly checking the lamp’s output
- Replacing bulbs according to the manufacturer’s guidelines
- Using a lamp that evenly distributes UV light
Application Errors – Layer Thickness
Another frequent culprit is the thickness of the gel layer applied. Applying the gel too thickly prevents the UV light from penetrating evenly across the entire layer, resulting in uncured or only partially cured areas. A general recommendation is to apply several thin layers rather than one or two thick coats. This ensures better light penetration and a complete cure.
External Factors Affecting the Curing Process
Besides the technical aspects of the curing process, environmental conditions can significantly influence the final result. Two major external factors include:
Ambient Temperature
The temperature of the room where curing takes place is a key factor. If the temperature is too low, the chemical reaction may slow down, leading to incomplete curing. Conversely, excessive heat can speed up the reaction irregularly. Maintaining a stable, optimal ambient temperature is critical for achieving consistent results.
Air Humidity
The moisture content in the air also affects the curing process. High humidity levels might interfere with the polymerization, leaving the gel sticky despite adequate UV exposure. Controlling the humidity in your workspace, possibly with a dehumidifier, can help in obtaining a fully cured nail gel.
Practical Solutions and Tips
Fortunately, there are several practical steps you can take to prevent and resolve the problem of sticky nail gel after UV curing.
Optimizing Curing Time
Fine-tuning the exposure time is vital. Follow these steps:
- Adhere to Manufacturer’s Recommendations: Always start by following the curing time stated on the product packaging.
- Conduct Test Cures: Try test applications on one nail to determine the ideal exposure time based on your lamp’s performance.
- Incremental Adjustments: If the gel remains sticky, adjust the curing time in small increments until you achieve full polymerization.
Choosing a High-Quality UV Lamp
An investment in a reliable UV lamp can make all the difference. When selecting a lamp, consider the following features:
- Adequate Power: Ensure the lamp provides sufficient UV energy, typically measured in watts, to fully cure the gel.
- Even Light Distribution: A lamp that distributes light uniformly over the nail surface will prevent partially cured spots.
- Reliability and Longevity: Choose lamps with proven durability and check for professional recommendations or certifications.
Correct Application Technique for Nail Gel
How you apply the nail gel is just as important as the curing process. To avoid a sticky finish, ensure:
- You apply thin, even layers rather than one thick coat.
- Proper nail preparation is conducted, including cleaning and de-greasing the nail surface, to ensure optimal adhesion.
- Each thin layer is fully cured before applying the next.
Expert Advice
Numerous professional nail technicians have encountered the sticky gel issue and offer the following tips:
- Run Pre-Cure Tests: Always perform a small-scale test before applying the product to all nails.
- Stay Updated: Regularly consult manufacturers’ updates and industry experts for the latest best practices and product innovations.
- Maintain Equipment: Keep your UV lamp and tools clean and well-maintained to ensure optimal curing performance.
Innovations in UV Gel Technology
The nail care industry is continuously evolving, and recent innovations are addressing the sticky gel issue more effectively than ever before.
New Nail Gel Formulas
Modern nail gel formulations are designed to cure faster and more completely. Key improvements in these formulas include:
- Enhanced Photoinitiators: These facilitate a more robust reaction under UV light, ensuring rapid and even polymerization.
- Additional Stabilizers: Ingredients that help regulate the curing process and reduce post-cure tackiness.
- Optimized Consistency: Gels that are formulated for application in thin layers yet maintain high durability and shine once cured.
Enhanced Curing Devices
Newer UV/LED lamps offer significant improvements over older models. Advances include:
- Intelligent Timing: Some modern curing devices adjust the exposure time based on the gel’s thickness and type.
- Uniform Light Emission: Advanced lamps provide even light distribution, ensuring full coverage for every nail.
- Energy Efficiency: Improved designs reduce energy consumption while increasing curing effectiveness.
Frequently Asked Questions (FAQ)
How Long Should I Cure the Nail Gel?
The ideal curing time generally ranges from 60 to 90 seconds, depending on the specific gel product and the power of your UV lamp. Always refer to the manufacturer’s guidelines and conduct a test cure to determine the best timing for your setup.
Can I Fix Already Cured Sticky Gel?
In certain cases, applying a thin top coat and giving it additional UV exposure can help correct minor stickiness. However, it is preferable to prevent the issue by ensuring proper application techniques and optimal curing conditions from the start.
What Type of UV Lamp Is Recommended?
High-quality LED lamps are typically recommended due to their even light distribution, longer lifespan, and energy efficiency. Investing in a reliable lamp can greatly improve the curing process and help you achieve flawless results.
Final Takeaways
To sum up, the issue of sticky nail gel after UV curing is multifaceted and can be attributed to various factors including:
- Inadequate Curing Time: Insufficient exposure leads to incomplete polymerization.
- Subpar UV Lamp Performance: Outdated or low-intensity lamps provide insufficient energy for proper curing.
- Application Errors: Applying the gel too thickly prevents uniform light penetration.
- Unfavorable Environmental Conditions: Extreme temperatures and high humidity levels can interfere with the curing process.
By optimizing these factors—for instance, by using a high-quality UV lamp, adhering strictly to recommended curing times, and applying the gel in thin, even layers—you can achieve a smooth, fully cured finish without any unwanted stickiness.
Expert Recommendations and Future Innovations
Industry experts consistently emphasize the importance of preventive measures. They recommend regular pre-cure tests, staying informed about new products and technologies, and never compromising on the quality of equipment and materials used. With continuous advancements in nail gel formulations and curing devices, the problem of sticky gel is expected to diminish further in the near future.
Final Thoughts
Delivering a flawless, long-lasting manicure is essential in the competitive world of nail care. By understanding the mechanics of UV curing, identifying the critical factors leading to sticky gel, and applying the practical tips outlined in this article, nail technicians can ensure that every client receives nails that are both beautiful and durable.
We invite you to share your experiences and any additional tips in the comments. Your insights can help build a community of professionals and enthusiasts striving for excellence in nail care. Embrace the latest technological advancements, continuously refine your techniques, and enjoy perfectly cured nails every time!