
Dreaming of long-lasting, salon-quality nails at home? Gel polish has taken the beauty world by storm, offering a glossy, chip-resistant manicure that can last up to three weeks. But for beginners, getting it right can be a challenge. Uneven finish? Peeling after just a few days? We’ve all been there.
This comprehensive guide, dives into the 5 most common mistakes people make when applying gel polish — and more importantly, how to avoid them. Whether you’re brand new to at-home manicures or simply want to improve your results, this article will walk you through everything you need to know.
💅 1. Skipping Proper Nail Prep
The Mistake:
Jumping straight into applying gel polish without prepping the nail plate is one of the top reasons gel manicures lift or peel within days.
Why It Matters:
Natural oils, dust, and leftover product on your nail surface can prevent polish from adhering properly.
How to Fix It:
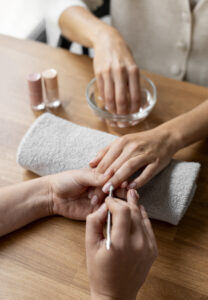
- Clean and degrease your nails thoroughly using an alcohol wipe or nail cleanser.
- Push back and gently remove cuticles – avoid cutting them unless absolutely necessary.
- Lightly buff the nail surface to remove shine.
- Never apply gel polish on wet or oily nails — they must be clean and dry.
👉 Pro tip: Use a lint-free wipe and avoid touching your nails with fingers after prepping.
💅 2. Applying Polish Too Thickly
The Mistake:
Applying thick layers of base, color, or top coat can lead to wrinkling, uneven curing, or even pain during curing.
Why It Matters:
Thick coats trap air and don’t cure properly under the lamp, leading to bubbling and peeling.
How to Fix It:
- Apply thin, even coats, and cure each layer fully.
- It’s better to do 3 thin coats than 2 thick ones.
- Cap the free edge each time to seal the polish.
👉 Pro tip: Thin layers also cure faster and more evenly, preventing heat spikes.
💅 3. Using the Wrong Lamp or Not Curing Long Enough
The Mistake:
Using a low-quality or mismatched lamp can result in polish that never fully sets.
Why It Matters:
Undercured polish can stay soft, sticky, or even cause allergic reactions due to uncured ingredients.
How to Fix It:
- Use a UV/LED lamp with at least 48W power.
- Always check your product’s recommended curing time and follow it.
- Don’t rush – even if the polish “feels” dry, it may not be cured inside.
👉 Pro tip: Avoid moving your hands or touching anything before fully finishing your manicure — smudging before curing is a top beginner issue.
💅 4. Ignoring the Importance of Base and Top Coat
The Mistake:
Skipping base or top coat, or using an incompatible brand, can ruin your manicure before it even starts.
Why It Matters:
The base coat creates the bond with your natural nail, while the top coat locks in the color and adds shine and protection.
How to Fix It:
- Always use a base coat designed for gel polish.
- Choose a no-wipe or high-gloss top coat depending on your finish preference.
- Don’t mix formulas from unknown sources — stick to tested, high-quality products.
👉 Pro tip: Let each layer cool for 30 seconds after curing to avoid premature lifting or cracking.
💅 5. Not Sealing or Finishing Properly
The Mistake:
Forgetting to seal the free edge or improperly removing the tacky layer after curing can shorten the life of your manicure.
Why It Matters:
Chips often start at the tips or edges of the nail. Improper removal or post-care leads to faster wear and tear.
How to Fix It:
- Always seal the edge of each nail with every coat (especially top coat).
- After curing the top coat, use a cleanser to remove the sticky inhibition layer (unless using a no-wipe formula).
- Avoid water or aggressive activity for at least an hour after finishing.
👉 Pro tip: Moisturize your cuticles daily, but avoid oils right before application — they can prevent adhesion.
Final Thoughts: Mastering Your At-Home Gel Manicure
Getting a flawless gel manicure at home takes a bit of practice, patience, and the right tools. By understanding the most common mistakes — and how to correct them — you’ll extend the life of your manicure, protect your natural nails, and achieve that glossy, professional finish every time.
Remember: even the best gel polish won’t perform if it’s applied incorrectly. Invest in quality products, take your time, and don’t skip the prep steps. The results? Stronger nails, fewer chips, and compliments guaranteed.