
The New Era of Nail Styling
Hybrid manicure is one of the most popular solutions in the beauty world. It combines the advantages of traditional nail polishes and UV/LED gels, allowing nails to look perfect for several weeks without the risk of chipping or scratches. However, among the many options available on the market, hybrid 3D manicure is gaining increasing attention an innovative technique that not only highlights the natural shape of the nail but also creates a three-dimensional styling effect, ideal for both everyday looks and special occasions.
The 3D effect in hybrid manicure involves applying products in such a way as to give the nail depth, subtle gradients, and exceptional color intensity. This solution works equally well for minimalist designs as it does for more daring artistic compositions. The key to success lies not only in choosing the right products but also in mastering specialized application techniques and caring for the condition of the nail plate. In this guide, we will explore how to achieve the perfect 3D effect in hybrid manicure, which products are worth choosing, and how to avoid the most common mistakes that can ruin even the most carefully planned design.
What Makes 3D Hybrid Manicure Unique?
Hybrid 3D manicure differs from traditional hybrid manicure primarily in its application method and final visual effect. While standard hybrid manicure focuses mainly on evenly covering the nail plate with a long-lasting polish that maintains its color and shine, 3D manicure introduces additional elements that add depth, structure, and uniqueness to each design. This effect is achieved by precisely applying multiple layers of hybrid polish, often supported by specialized tools such as polishing blocks, modeling brushes, or detail knives.
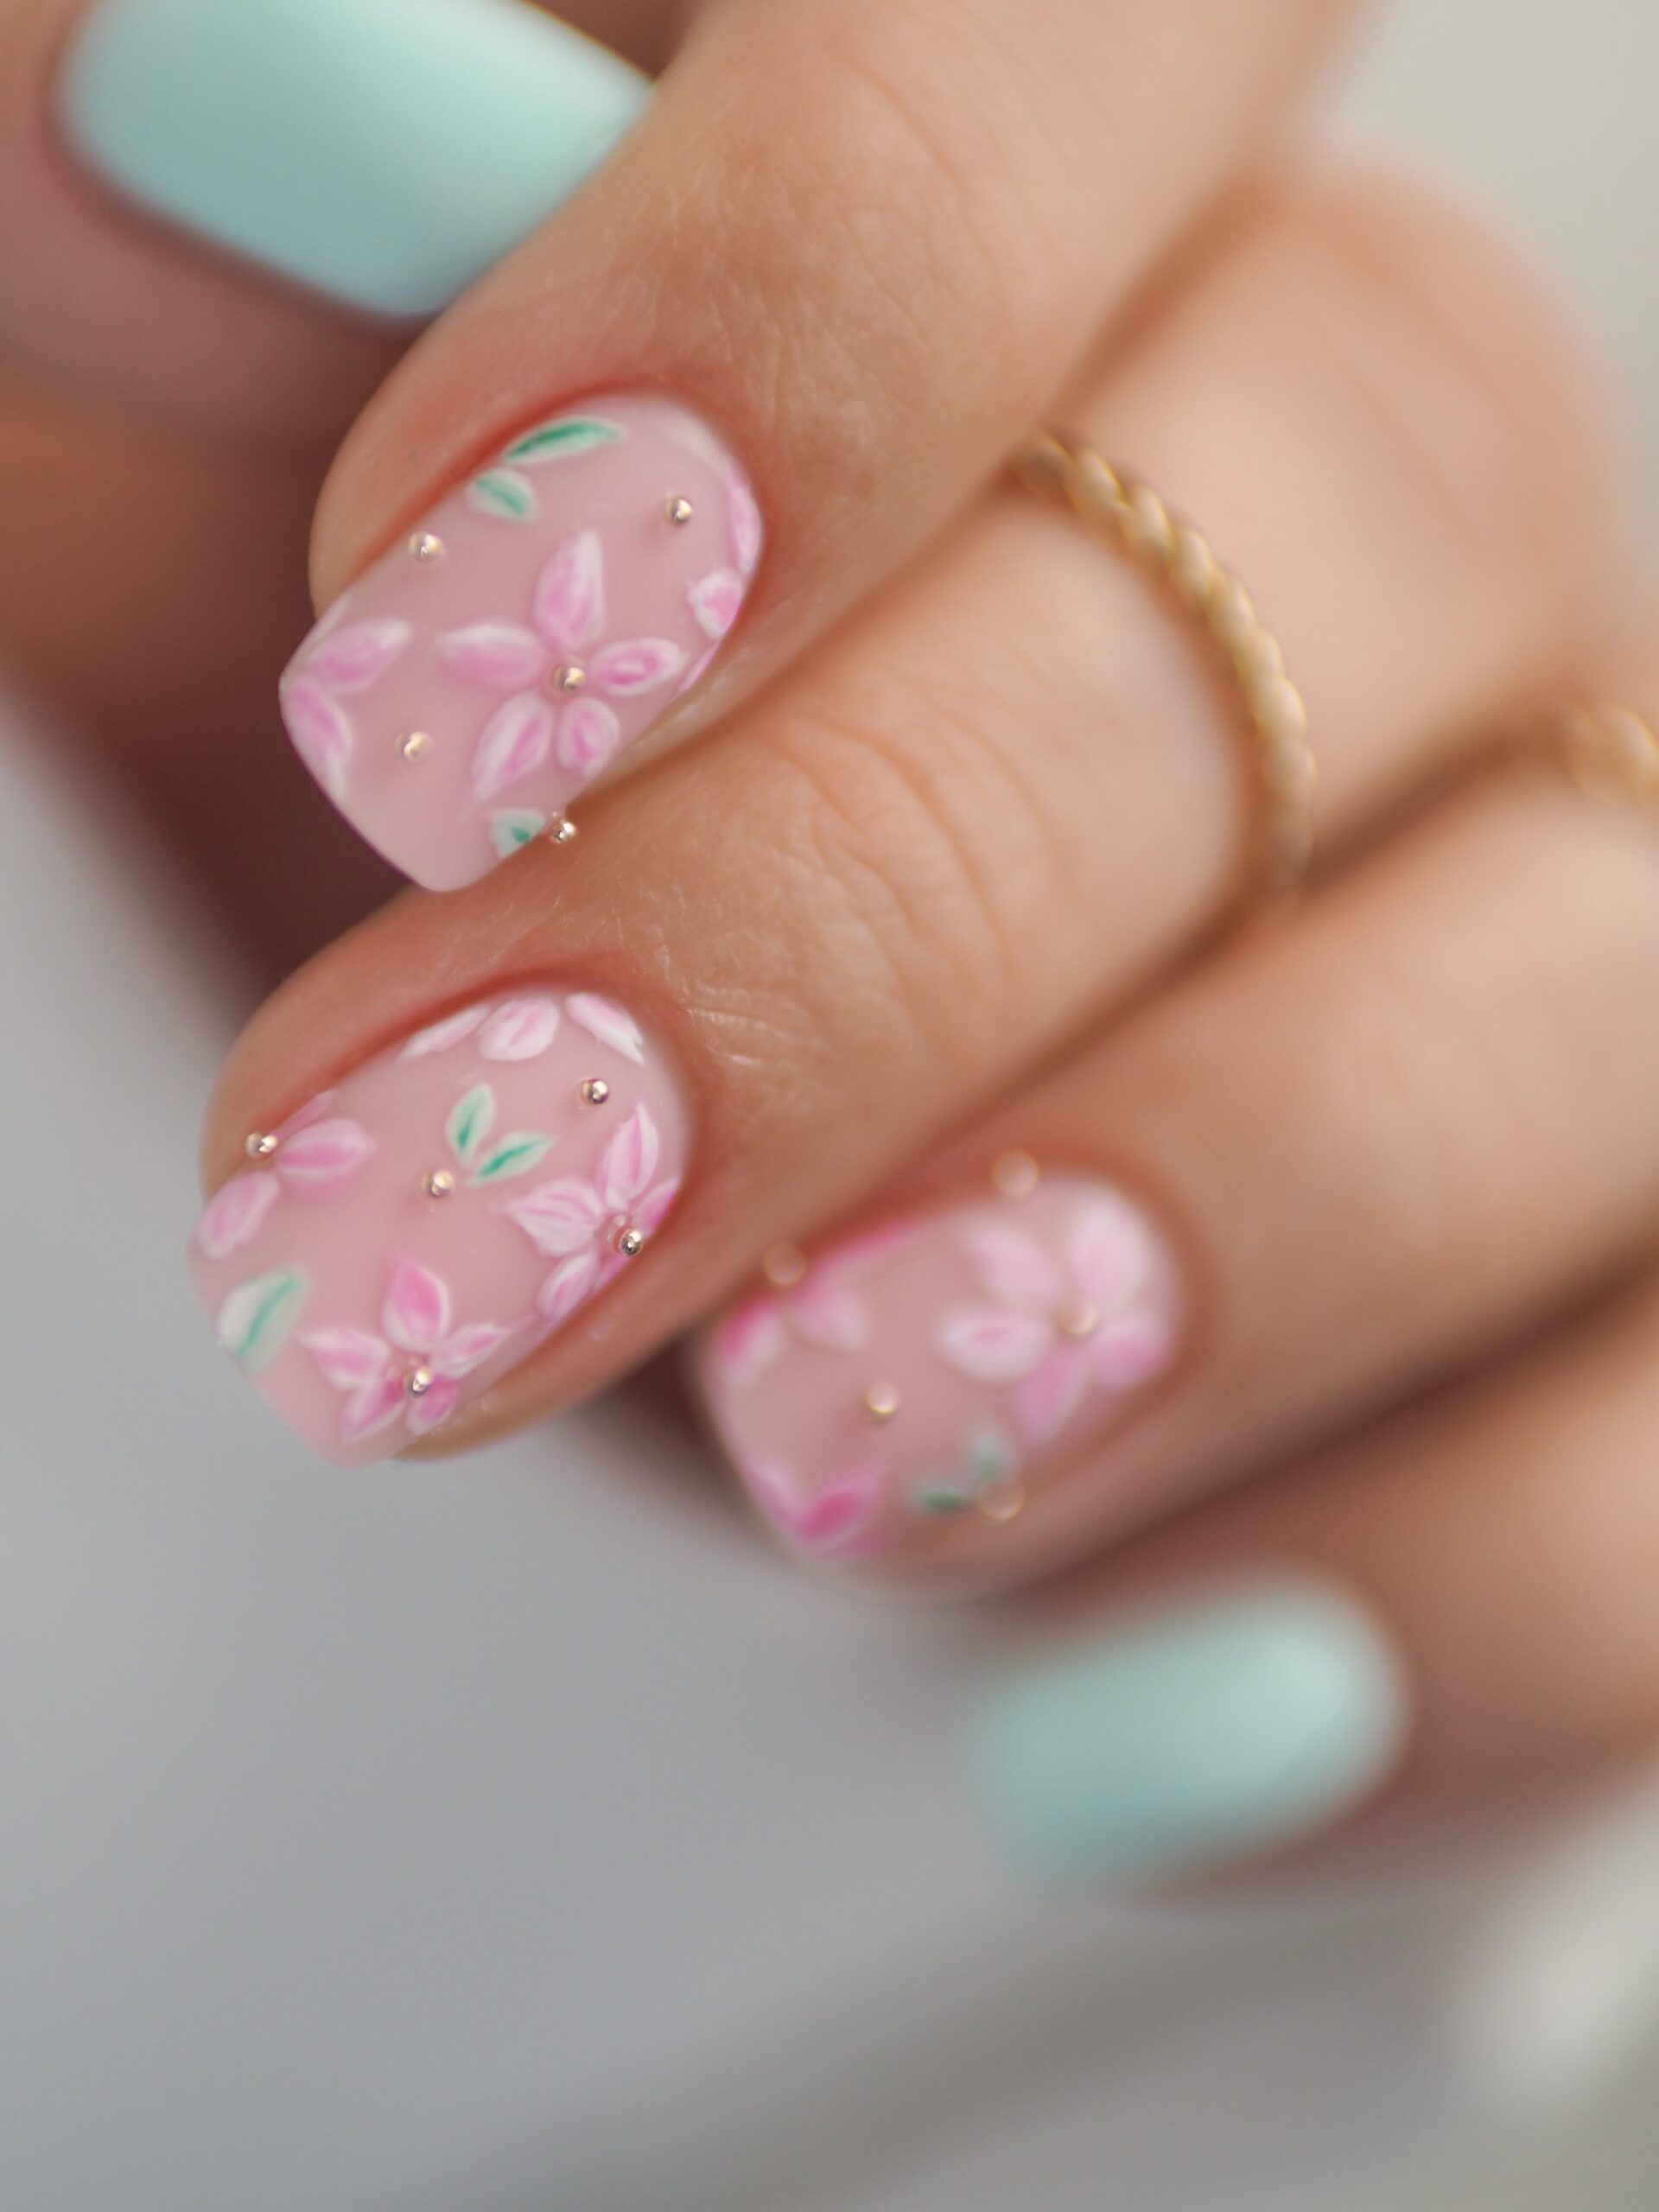
One of the key aspects of 3D manicure is the ability to work with volume. Styling can include creating reliefs, delicate waves, simulated matte or transparent textures, and even detailed painting that achieves an optical 3D effect. Compared to traditional hybrid manicure, where the main goal is a perfectly smooth surface, 3D manicure relies on contrasts thin and thick layers, various textures, and strategically placed details that highlight the natural shape of the nail. As a result, every design becomes a piece of art that not only lasts long but also stands out with its individual character.
In practice, the differences between the two techniques are noticeable already at the design stage. Where traditional hybrid manicure usually limits itself to a single solid color or classic French tips, 3D manicure opens the door to more advanced compositions from geometric patterns to realistic illustrations. Additionally, this technique allows for creating light effects and shadows, significantly increasing the attractiveness of the design. That’s why 3D hybrid manicure is gaining more and more recognition among both professional nail technicians and women who do their own manicures at home it offers the possibility of personalization and creative approach to nail styling while maintaining the durability and ease of maintenance typical of hybrids.
Preparing Nails – The Foundation of a Perfect 3D Effect
Before moving on to the actual 3D styling, it is essential to properly prepare the nail plate. Only well-prepared nails will provide a stable base for multi-layered hybrid applications, which in turn will affect the longevity and aesthetic appearance of the design. The preparation process consists of several key steps that should be performed carefully, regardless of whether you’re working on natural or acrylic nails.
The first step is cleaning the nail surface. Even if the nails appear clean, it is necessary to remove any traces of oil, dust, or moisturizing oils that could interfere with the adhesion of subsequent products. For this purpose, a specialized degreaser and disinfectant works best, effectively removing grease without drying out the nail plate. It’s important that the product is acetone-free, as it may negatively affect the structure of the nails, especially if they are sensitive or thin.
Next, ensure that the nail surface is perfectly leveled. If working on natural nails, it’s advisable to use a file with grit 180/240 to adjust the shape and remove any irregularities. In the case of acrylic nails, light filing is also recommended to improve the adhesion of the base and hybrid polish. After filing, it’s a good idea to use a soft buffer or polishing block to remove micro-unevenness and give the surface a gentle sheen, which will facilitate the application of colored layers.
Another important step is gently dusting the nails after filing. This involves removing small particles and dust that might interfere with product adhesion. A soft brush or nail duster can be used for this, eliminating dust without touching the surface with your fingers. Maintaining cleanliness at every stage of work is crucial, especially in 3D designs, where each layer must adhere perfectly to the previous one to achieve the desired depth and structure.
Finally, apply a strengthening base coat. The choice of base depends on the type of nails for natural nails, a reinforcing base with keratin or biotin is ideal, while for acrylic nails, an adhesive base coat ensures strong adhesion of the hybrid. Apply a thin, even layer, avoiding excess product around the cuticle to prevent lifting. Once applied, cure the base under a UV/LED lamp according to the manufacturer’s instructions before proceeding to the next steps.
Attention to each stage of nail preparation not only ensures a long-lasting design but also protects the nail plate from damage and promotes regeneration. A well-prepared surface is the foundation of success when creating even the most advanced 3D patterns, so it’s worth dedicating enough time to this phase to ensure optimal conditions for further work.
Essential Products for Achieving a 3D Effect
To create a perfect hybrid 3D manicure, you’ll need the right products that not only ensure the durability of the design but also allow for precise layering and the creation of depth and structure. The key to success is choosing high-quality hybrids that adhere well to each other and don’t mix during work. Ideal hybrids for a 3D effect are those with a thick yet elastic consistency they allow for creating reliefs and precise detailing without running or spreading under the UV/LED lamp heat.
An important tool in creating a 3D effect are specialized brushes and lamp attachments that enable precise modeling of layers. Brushes with fine bristles, such as detail brushes or liner brushes, are essential for applying precise lines, dots, and patterns. For more advanced techniques, investing in a set of modeling brushes especially ball and flat brushes can help create gradients and shading. In addition, rubber modeling knives can be useful for applying thicker layers of hybrid and creating reliefs.
Other necessary tools include a polishing block, nail brush, and duster used to prepare the surface and remove dust and filings after each stage of work. It’s also important to have a powerful UV/LED lamp that ensures full curing of each layer, regardless of its thickness. A 36 or 48-watt lamp is the optimal choice for professional designs, as it enables quick and effective curing even of the thickest hybrid layers.
You cannot forget about the top coat either, which serves as the protective final layer. In the case of 3D designs, a high-thickness, high-gloss top coat is particularly recommended its role is not only to protect the entire design but also to enhance the 3D effect thanks to a perfectly smooth surface. It’s also useful to have specialized decoration tools such as detail knives or tweezers, which help in precisely placing decorative elements like stones or holographic stickers.
Choosing the right products has a huge impact on the final outcome of the design so it’s worth investing in branded hybrids and accessories designed specifically for advanced modeling techniques. This way, you’ll achieve not only an aesthetic 3D effect but also a durable design that will look perfect for many weeks.
Step-by-Step Guide: Creating a 3D Effect in Hybrid Manicure
Creating a 3D effect in hybrid manicure requires precision, skill, and knowledge of specialized techniques that allow you to give nails depth and structure. Below is a detailed step-by-step guide that will help you achieve a perfect 3D effect, whether you’re a beginner or an experienced nail technician.
1. Designing the Pattern and Planning the Styling
Before starting work, it’s worth sketching the pattern you want to create or finding inspiration in ready-made examples. The 3D effect can be achieved in different ways from delicate reliefs to more dynamic compositions using various textures and colors. It’s important to plan the order of applying layers so that later elements don’t interfere with earlier details.
2. Applying the First Layer of Hybrid
After preparing the nails (clean, filed, and base applied), apply the first layer of hybrid polish. In the case of 3D styling, choose a background color that will serve as a neutral backdrop for the following layers. Apply the layer evenly, avoiding excess product around the cuticle, then cure it under a UV/LED lamp according to the manufacturer’s instructions.
3. Creating Reliefs and Gradients
The next step is applying subsequent layers of hybrid in a way that allows achieving a 3D effect. To create reliefs, apply thicker amounts of product in areas intended to be more convex. Use modeling brushes to control the thickness and shape of each layer.
If you want to achieve shading or gradient effects, you can use the color blending technique. Flat or ball brushes are ideal for gently spreading color and creating smooth transitions between shades. Remember that each layer must be cured separately to prevent later elements from interfering with the earlier pattern.
4. Adding Details and Special Effects
Once the base layer is hardened, proceed to adding details that will emphasize the 3D effect. You can use the detail painting technique creating thin lines, dots, or symbols that add depth to the design. Liner brushes or detail brushes are perfect for precise pigment application.
Another option is creating light and shadow effects use darker and lighter shades of hybrid to highlight certain parts of the design. Experiment with different textures for example, apply a layer of matte hybrid on part of the nail to contrast with glossy elements.
5. Final Protection of the Design
Once the entire design is completed, protect it with a hybrid top coat. In the case of a 3D effect, a thick, high-gloss top coat is especially recommended its role is not only to protect the entire design but also to enhance the 3D effect thanks to a perfectly smooth surface. Apply the top coat carefully, avoiding excess product around the cuticle, then cure it under a UV/LED lamp. Finally, lightly buff the top coat with a soft buffer to remove any imperfections and give the nails a perfect finish.
Creating a 3D effect in hybrid manicure is a process that requires patience and skill, but with the above steps, you can achieve a unique effect that will make your design stand out. Whether you opt for minimalist reliefs or more complex artistic compositions, remember that precision and attention to detail are key to success.
Common Mistakes and How to Avoid Them
When creating a 3D effect in hybrid manicure, many beginners make typical mistakes that can negatively impact the final appearance of the design. One of the most common issues is applying overly thick layers of hybrid polish. Although the 3D effect requires building volume, too much product can lead to extended curing times, which in turn may cause instability in the design. As a result, nails may chip or lift faster, especially in areas where the layer was too thick. To avoid this, it’s best to use the “layering technique” applying several thin layers of hybrid instead of one very thick one, allowing you to achieve depth without risking deformation of the design.
Another frequent mistake is neglecting proper nail surface preparation. Even the highest quality hybrids won’t adhere well if the nails haven’t been thoroughly cleaned and de-dusted. Residual oils, dust, or moisturizing oils can disrupt product adhesion, leading to lifting over time. To prevent this, always use a specialized disinfectant and degreaser that removes grease without damaging the nail structure. Additionally, after filing and preparing the surface, it’s important to remove all debris and dust preferably using a duster or soft nail brush.
A mistake that often occurs among beginners is applying subsequent layers too quickly without properly curing each one. Each layer of hybrid must be fully cured under a UV/LED lamp according to the manufacturer’s instructions; otherwise, subsequent layers may mix, disrupting the 3D effect and reducing the design’s durability. Keep in mind that curing time may vary depending on the lamp’s power and the thickness of the applied layer if unsure, it’s better to extend the exposure time by a few seconds than to risk incomplete curing.
Another common error is using the wrong tools for creating the 3D effect. Attempting to create reliefs with a regular nail polish brush can lead to uneven application and difficulties in achieving the desired depth. To avoid this problem, invest in modeling brushes such as ball or flat brushes, which allow for precise application and smooth transitions between layers.
Lastly, many people forget to finish the design with the appropriate top coat, which serves as a protective layer and enhances the 3D effect. Choosing the wrong top coat such as one that is too thin or incompatible with the technique may cause the reliefs to become less visible or even disappear entirely after curing. To avoid this issue, choose a thick, high-gloss top coat that not only protects the design but also emphasizes its three-dimensionality.
By avoiding these common mistakes and following basic technical guidelines, you can significantly improve the quality of your design and achieve a professional 3D effect that will look perfect for weeks.
Expert Recommendations – How to Achieve a Perfect 3D Effect
Experienced nail stylists know that achieving a 3D effect in hybrid manicure requires not only the right products but also precision and technical skills. Here are some practical tips from experts to help you achieve a professional-level 3D effect:
1. Pay Attention to Layers and Gradations
Professionals emphasize that the key to a realistic 3D effect is skillful layering. Instead of applying one thick layer of hybrid, it’s better to gradually build depth by applying several thin layers. This way, the design will be more stable, and the reliefs more defined. Experts recommend using modeling brushes that allow you to control the thickness and shape of each layer, enabling smooth transitions and shading.
2. Use Shading Techniques
Shading is one of the most effective ways to add depth to a design. Darker and lighter shades of hybrid can be applied to specific areas to emphasize the structure of the design. Stylists recommend using flat or ball brushes, which allow for gentle color blending and smooth transitions between shades.
3. Focus on Proportions and Perspective
For the 3D effect to look realistic, it’s important to maintain proper proportions and perspective. Experts suggest starting with a sketch or selecting a ready-made pattern as a reference point. In more complex compositions, it’s helpful to apply the “light and shadow drawing” technique, which allows for creating realistic shapes and details.
4. Choose the Right Top Coat
The final 3D effect largely depends on the chosen top coat. Nail stylists recommend using thick, high-gloss top coats that not only protect the design but also enhance its three-dimensionality thanks to a perfectly smooth surface. Avoid overly thin top coats, as they may make the reliefs less visible.
5. Experiment with Textures and Special Effects
To add uniqueness to the design, experts suggest experimenting with different textures such as creating matte and glossy sections that add depth and dynamics to the pattern. You can also use special effects like holographic stickers, micro-glitters, or gemstones to highlight the 3D effect and make the design even more original.
By following these tips, you can significantly improve the quality of your design and achieve a professional 3D effect that will look perfect for weeks.
Nail Regeneration After Hybrid – How to Restore Their Healthy Appearance
Although hybrid manicure is an excellent solution in terms of durability and aesthetics, the removal of the hybrid and frequent curing under UV/LED lamps can negatively affect the condition of natural nails. Therefore, after removing the design, it’s especially important to apply appropriate regenerative steps to restore the healthy appearance and strength of the nail plate.
The first step in the regeneration process is the gentle removal of the hybrid. Instead of peeling or scraping, which can damage the nail’s keratin layer, it’s best to use a specialized hybrid remover preferably in liquid form or as soaked pads. Apply it to each nail, wait a few minutes, then gently remove any remaining residue with a wooden stick or polishing block. Avoid aggressive removal of the hybrid to preserve the integrity of the nail plate and prevent excessive drying.
After removing the hybrid, it’s necessary to restore hydration and elasticity to the nails. For this purpose, nail and cuticle oils containing ingredients such as argan oil, ricinus communis (castor oil), vitamin E, or panthenol work best. These oils should be applied daily, preferably in the evening, by gently massaging them into the cuticles and matrix area. Regular moisturizing not only improves nail flexibility but also supports the regeneration of the surrounding skin, which is especially important after prolonged hybrid wear.
Additionally, it’s worth using a nourishing mask or balm for nails, which acts deeper than regular oil. These products often contain keratin, biotin, or peptides that penetrate the nail plate, filling in micro-damage and strengthening nails from within. The mask should be applied at least 2–3 times a week, preferably overnight, to ensure maximum regenerative effect.
An important aspect of regeneration is also giving the nails a break. Frequent hybrid applications without rest can lead to dryness, brittleness, and even deformation of the nail plate. Experts recommend taking at least a 1–2 week break between hybrid manicures, allowing the nails to regain their natural balance and strength. During this time, it’s advisable to limit contact with harsh detergents, wear gloves during household chores, and avoid excessive moisture, which can soften the nail plate.
Ultimately, external nourishment should be supported from within. A diet rich in vitamin B7 (biotin), zinc, iron, and omega-3 is key to healthy nails. Biotin supplements or vitamin complexes dedicated to nails can accelerate the regeneration process, especially if the nails are particularly weakened after multiple hybrid applications.
By following the above guidelines, you can effectively restore the healthy appearance of your nails after a hybrid manicure and ensure their long-term resilience for future designs.
Summary and Call to Action
The 3D effect in hybrid manicure is an innovative technique that allows you to create unique designs, combining the durability of hybrid polish with creativity and precision in detail. With proper nail preparation, the right product selection, and careful layering, every woman whether a beginner or experienced can achieve a professional-level depth and structure effect. The key to success is attention to every stage of the process, from surface preparation through hybrid layer application to the final protection of the design.
Nail health also plays a crucial role in creating the perfect design. Regular regeneration of the nail plates after hybrid removal, proper moisturizing, and the use of nourishing treatments that support growth and resistance will help avoid dryness, brittleness, and other problems that can hinder the achievement of the desired effect. Remember that hygiene and nail care are just as important as the styling technique itself.
Now that you know all the secrets of creating a 3D effect, we encourage you to share your experiences! If you’ve tried this technique or have your own tricks for nail styling, write about it in the comments we can share knowledge and inspire each other. And if you’re looking for products that will help you achieve the perfect 3D effect, feel free to browse our offer you’ll find everything you need to create a unique design.